Saturday, June 9, 2012

Funky Flock Card...

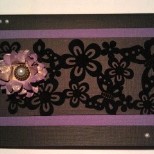
This birthday card was created using a black and purple textured cardstock . The flower frenzy flock ( say that when you're drunk!), is a self adhesive flock from Kaszazz. I created the flower using the scallop punch - several layers, spritz with smooch spritz grape and then do some creative crunching!

I needed to create a gift card holder, so made a die cut scallop strip, tied some ribbon around and then could slot my card in. I then used the scallop die at the bottom of the inside piece to tie it all together. The scallop die is from Kaszazz and I used the ezy-press to create it.

Now, I had the age old dilemma of , what to put a 3D card into! Well, I used the envelope template from the ezy- press and loosely folded it over and secured it with a tied bow. I made another flower- I know I must really love the person I made if for , right? Yeah, she is rather spesh. I wanted to make it so the bow was easy to open, so I stuck the flower onto a small clip and slotted it over the middle of the bow!
Anyway, hope your weekend it great, we have a long one- The Queens' Birthday weekend.
Happy Birthday Elizabeth.
Take care
Deb

Thursday, June 7, 2012

Cherish Frame


Just a simple frame that I created for a competition. I used distress crackle paint to distress the white areas. I stamped a Kaszazz flourish stamp on both sides using stazon ink. I coloured some white lace to a pink using distress stain- spun sugar. I created the rose using circles and was quite proud, but I have since learned some much cooler techniques on making paper roses!! Oh well, we live and learn. I also used some bling words from Kaszazz - Cherish. Did you know that you can colour any bling and bling words using your re inkers? Just make sure they are permanent ink re inkers, and then you can customize them to your projects. Pretty cool hey?
Anyway, I hope you/re having a creative week so far.
Take care
Deb

Tuesday, June 5, 2012

Butterfly explosion


I created this canvas for a friend of mine who was turning 50. I decided to do 49 coloured butterflies and then the 50th, in the top right hand corner of the paper, is painted gold. I absolutely love these inspirational words, I don't know who to give credit to for it, but I re typed it and decided that this would definitely suit my friend. I coloured in each butterfly with copics and punched them out using a butterfly punch. Such fun !
Enjoy.
Deb

Sunday, July 17, 2011

Art Journal #3

This page,like the others really just evolved. I dragged tumbled glass distress ink and bundelled sage distress ink across the paper to create a background. I then stamped one of our new large stamps on the right side using silver colorbox ink. The silver flower image on the left is made using a design adhesive and holographic metallic foil. this one evolved around the words: 'There are no Ordinary Moments" I wanted to make it a bit Etherial.

Now with this page, I wanted to use the swirl flower type technique and then thought, it's a bit out there! I then thought of the them of daring to dream and be a little different, hence the use of some unusual colours. Obviously the wings represent the desire to fly and achieve all that you set your heart on. I love layering papers and often enjoy putting some colours together that I wouldn't have thought of but that would make some ideal backgrounds.
Now I know the Art Journal is taking over this blog just a little, but when you look at the pages, there may be something in them that you like. Take that little thing and use it in your next creation.
I hope you have a creative week- mine will be!
Take care
Deb

Monday, July 11, 2011

Art Journal #2

This page was fun because I created the background using inks and stamps. It's great to let yourself be free with them.I just love trees, so it seemed natural to do a tree. I used the kaszazz stamps and the ezy press for the leaves. I just love the leaf die . I punched the blossoms out of SB paper using the small scallop punch. As I was doing this I was pondering how our lives change and move through different seasons, this really is theraputic.

 Sorry for the strange placement- the computer has a mind of its own!! This actually started out as me sticking down some SB paper to cover the ink that had leaked through from the other page. I then wanted to use distress crackle paint in white, so I just painted it and then thought it looked a bit waterfallish. It all just grew from there. I added bits of smooch to highlight as well as glitter. The words on here are: Give thanks. It doesn't matter who you thank, just make sure you are grateful to family, friends, for situations and give thanks to any higher power whom you worship if that's your thing. It can do so much for your soul to be grateful. It lifts you up and helps you to soar.
Well, that's my bit of art and philosophy for today.
Hope you have a great week.
Take care
Deb

Wednesday, July 6, 2011

Art Journal #1


Well, I've been having the best time creating an Art Journal! What I"ve enjoyed the most is the freedom of knowing that this is just for me. I don't have to create to give it to anyone, it's just for the fun of it. I've used a visual arts diary for this. All products are Kaszazz . On the cover I"ve used an eclectic blend of  our SB papers. The words are from our Carnival stamp set, the ferns are a  Lucy stamp, everything is current. I punched 3 large daisies and 3 medium ones to create the flower in the corner. The base paper is a print, but I stamped over it using chalk ink - berrylicious, lime pastel, pink pastel. I also distressed the edges.
On the first page , I drew the face using pencil and then coloured parts in using the stylus and sponges and distress inks. I stamped again with berrylicious on the background as well as coloured the background in with a sponge. I used the Girls rubons for the extra words etc that are black. Of course some glitter was added....... naturally.
Anyway, I hope this inspires you to head out and pick up a visual arts diary to do some creating. Give it a go, I think you're going to love it!
Take care
Deb

Monday, July 4, 2011

A fairy gift !!


Recently it was some very special little twin girls 10th birthday. I decided to give them each a fairy picture that I'd drawn and each one captures their personality. I drew them with chalk pastels. I also made them each a box and in the box they received a crystal cave which when you put them together they join perfectly . I wanted to show the boxes but unfortunately the photos are too shocking!! Not unlike my photography of the above pics!!
Anyway, Hope you enjoy and I've more to share, so FINALLY I'll get to popping up some posts.
Have a great week.
Take care
Deb

Wednesday, February 23, 2011

My Art Space !


Recently I did a major tidy up and created my own space to create! Not the dining room table! Now I can create without tidying up the mess each time. I just thought I'd share my creative space with you, although it certainly doesn't show how much craft stuff I have - whew!  I've also posted some pics of up and coming workshops.

 French Provincial Frame workshop - $30

 Adorable Fairy Princess layout - $30
Please send me an email if you want details of either of these two fantastic workshops!
Take care
Deb

Sunday, February 20, 2011

Simple sunset card


This card grew out of a sunset card I spotted in a magazine. I then used distress inks- fired brick, marmalade and mustard with the blending tools to create the background on plain white card. Using ancient page coal black, I then stamped the tree, bird, flowers and butterflies on the front and inside. I finished it off with a black organdy ribbon and 3 peach coloured diamantes. All products are from Kaszazz, but some are only available as a hostess!!
I'd love to see what you create with the sunset colours, so come on, when you've made your card or page, please take a photo and email it to me so I can pop it on the blog for all to be inspired by ! Don't keep your creation to yourself- share!!!
Anyway, hope you have a great week and create something fantastic.
Deb

Monday, February 14, 2011

Erin's birthday cards


Today was Erin's birthday, and these were her made cards. The Butterfly one was made by me. It's quite self explanatory really. I used the cuttlebug for various embossed effects. I layered the butterfly with black under- the trick is if you want the card to look like it is see through, punch out the same colour as the background and layer it under the punched shape. I then used sticky bling to bling it up!
The second card is from my sister, Di. Her style is more cute than mine. She obviously also used the cuttlebug for texture, but made the fence using the cricut - very cute. Not sure I agree with the sentiment, but she felt safe saying it as she is miles away! My kids love getting Aunty Di's cards because they are always of such high standard and meticulously done. Thanks Di.xxx
I hope these have inspired you just a little to pick up some card, a stamp and a punch and create something wonderful this week.
Take care till next time.
Deb