Wednesday, December 11, 2013
Kaszazz Christmas owl card
I'm involved in a Global Card swap group and we had to make a Christmas card to send to our partner. Lucky it was only one card! I have got so much use out of one particular Christmas Stamp from Kaszazz and that is the Christmas Hat. It is sensational, because you can turn any ordinary stamp into a Christmas one! Great value for money. I think I'll make up some more examples so you can see the versatility of it. All stamps used were Kaszazz. I stamped the poinsettia flower twice on scrapbook paper of corresponding colours. This just gave them a little bit more texture. It's quite fun stamping onto scrapbook paper. I then used coloured pencils to bring some depth into the stamps. I layered the petals on top. In the centre, I used gold smooch to bring some sparkle. Oliver owl is coloured in using a combo of Tria markers and coloured pencils. He also has some smooch highlights. The base of the card is white, with red essentials card stock (I think!) . I used the cuttlebug to make a leafy design on the background, and I used nestabilities dies to cut out the background as well as the inside of the card. For the white parts on the hat, I used glossy accents and sprinkled with fairy dust.
This was such fun to make, but I would only make a few I think! I'm going to see if I can turn some other stamps into Christmas ones, using the Santa hat!
Bye for now.
Deb x
Friday, December 6, 2013
Floral 100th Birthday card
Recently I was commissioned to make this card for a 100th Birthday. What an honour! I was able to also see pictures when the lovely lady received her card, she looked so lovely surrounded by a large family. I had to make it a big card so all could easily write in it- so it's A4 size. I confess I did buy one packet of small flowers, but I made the rest. It was so much fun creating these flowers. If you're wanting to know how to do that, head over to www.kaszazz.com and click on information sheets (I think), you will be able to see how to do some really great flowers. I know that when you receive a card it can bring you such pleasure, but I've got to say, it gives me even more pleasure to make them.
I hope you have a fantastic day
Take care
Deb x
Thursday, July 18, 2013
Dragon card
Wow, I can't believe it's been so long since I posted! Sorry about that. I'm going to set up a schedule I think, so that I can be disciplined in my creating. I made this dragon card for a copic card competition. It was so much fun getting acquainted with my copic markers again- loved it. The dragon stamp is from Sweet pea stamps , the roses were made with a memory box die and the ivy and the words are stamps from Kaszazz, as is the paper. Quite a simple card yet effective. I've been doing a lot of colour experimentation lately doing paintings and art journaling, so I think it's trickled over onto my cards!
I hope you have an awesome weekend and get some creative juices flowing.
Take care
Deb
x
Thursday, May 23, 2013
Mermaid flower card
I just love this La la land crafts stamp of mermaid Marci. It is always so much fun to colour in and create with her. I did this card for a friend who was leaving and she loves wearing flowers in her hair. The base card is from a pink pack by Kaszazz. I embossed the white card on the cuttlebug to create the frame. The mermaid is cut out and stuck down. (I think) The writing is just mine. The flower is created using retro daisy punches, spritz them with water (not too much) and then using tweezers, curl them into the centre of each petal. This gives 'sausage' type rolls of each petal. When you've done 3 large and 2 medium , then you're ready to build the flower. Finish it off with a diamante or some enamel accents.
The image was coloured in with Tria markers.
Hope you enjoyed and are feeling inspired to create !
Take care
Deb
x
Friday, May 10, 2013
Welcome Little One card
I made this sometime ago for a friend who was having a baby. This card was a little larger than average because it needed space for lots of people to write. The pram is just a circle cut in half. The circles can be punched with the circle punch or rolled through the cuttlebug using nestibilities. With the yellow half circle, I used a texture embossing folder on some yellow cardstock and then rolled it through the cuttlebug to get a smaller circle shape to fit in. I did use mounting tape on the pram to lift it from the background making it stand out more. I stamped a Kaszazz giraffe stamp , coloured it in with lyra crayons and a water brush. The rest is quite self explanatory with the embossing and layering , pearl embellishments and ribbon.
I'd like to challenge you today to look in your scraps draw, find some patterned paper and see if you can use it on a card.... centre everything around this paper. Have fun !
Have a great weekend.
Take care
Deb
x
I'd like to challenge you today to look in your scraps draw, find some patterned paper and see if you can use it on a card.... centre everything around this paper. Have fun !
Have a great weekend.
Take care
Deb
x
Sunday, May 5, 2013
Magical castle Card
When I got this great castle stamp, I had no idea how I was going to use it! This card just evolved over time. I coloured in the castle using Tria markers, the ivy, which is a separate Kaszazz stamp and the little front mushroom were all in tria markers. I then used the brick embossing folder for the cuttlebug and created a texture behind. The word " magical moments' is a kaszazz stamp.
Once all the elements of this card were all together, I added sparkle using ice stickles so that it gave it a more magical feeling. I think the challenge we face with some stamps is to see how many ways we can use them. Do you have a stamp that you're not sure you know what to do with?? Why don't you share and lets see if we can come up with some suggestions.
Well, I hope you have a magical week filled with sparkle.
Take care
Deb
x
Wednesday, April 17, 2013
You are fabulous...
I just love this fairy image! She is from Whimsy stamps and called 'Silver Fairy'. It's definitely one of my favourites. There are several layers to this card. I used Kaszazz shield die for the craft colour background, the circle punch for the moon and a memory box die for the dandelion type image, which is actually called Chloe Stem. The grass die is also from memory box. They make great dies which come in handy little envelopes to store them in too. I coloured the image in using Tria markers and highlighted certain parts using Ice stickles. I used distress inks to colour the chloe stem and the shield. I then just layered them all together on a white card with the words "you are fabulous" , which is a mini messages stamp from Kaszazz.
Had a lot of fun creating this card. So, my challenge to you is, create a card using several layers which creates a bit of a scene . (and I do mean landscape- not a dramatic event!! )
Hope you are having a creative week.
Take care
Deb
xx
Had a lot of fun creating this card. So, my challenge to you is, create a card using several layers which creates a bit of a scene . (and I do mean landscape- not a dramatic event!! )
Hope you are having a creative week.
Take care
Deb
xx
Tuesday, April 9, 2013
Sunset Forest card
I have quite a few stencils and must say, I don't play with them as much as I'd like. I used this tree stencil with distress inks and blenders. The colours used were fired brick, spiced marmalade and mustard. After creating, I cut it out and did a subtle highlight of black soot on the edges. I then tied this kaszazz grosgrain ribbon around it and stamped 'it's your birthday' on a small strip of card, edging it with black soot. I adhered the forest scene to a white card and then mounted it onto a base orange card from the kaszazz range.
All a bit of fun really, now to dig out some more stencils and have even more fun!!!
Take care
Deb
xx
All a bit of fun really, now to dig out some more stencils and have even more fun!!!
Take care
Deb
xx
Thursday, April 4, 2013
Window Flowerbox Card
I"ve had this image for quite a while, but couldn't figure out what to do with it. It's great when you get that sudden burst of inspiration. I'm quite happy with the result! I coloured in the window with coloured pencils and burnished them to give a slightly shiny look. I used the inspiration words from Kaszazz mini messages stamps - love their mini messages. The flower stamp is a Stampin Up one from the set called Bliss. I used Tim Holtz Distress markers to colour in the flowers , huff on them and stamp. The base background is an embossed piece of cardstock - brick design. This has all been put together on an ivory card. Quite a bit of fun really. I feel inspired to try some more with this window- I wonder how else I can adapt this...
Hope you're having a creative time.
Deb
x
Hope you're having a creative time.
Deb
x
Saturday, March 30, 2013
Cute cat card
This card is one of those that can be adapted into various colours and still have good appeal. If you wanted to make it more of a boy card, you would just need to have a straight ribbon (no bow) and obviously boy colours. The frame die could just be replaced with something a little more straight or a wooden look frame. I love taking a card that I love and adapting it , so why don't you give it a go, it's really fun!
Hope your Easter weekend is full of creativity and maybe a little chocolate!
Take care
Deb
x
Friday, March 29, 2013
Just for you..
I created this card on Kaszazz cardstock. The stamp is from La la land crafts - Dress up Marci. I coloured it in using tria markers. The stamp , ribbon and embellishment is also from Kaszazz. I put some highlights onto Marci's beads and flower using glossy accents.
I love the La la land crafts stamps, they are so filled with character- I think I need to increase my supply of these!!
Have a happy day!
Deb
x
Thursday, March 28, 2013
Wings of a butterfly card
I've had lots of fun today creating! I love it when an idea inspires you from a magazine, and then you take it and make it your own. The stamps I used are Kaszazz rose and vine set - I just used the small vine and restamped it. I also used a stampin up butterfly from the set Papillion potpouri, as well as the matching punch for the butterfly. The words stamp is from Kaszazz and the embossing folder is a cuttlebug one- do not know the name, sorry.
To colour in the vines and butterflies, I used letraset Tria markers. I find these markers can actually be used on ordinary cardstock as well as speciality paper, so it makes them more flexible. The base card is Kaszazz ivory stock and the embossed vine piece is stuck flat with the other things, butterflies and words mounted for some height.
I have made quite a few today, so I'll pop some more up over the next few days.
Until then, be inspired
Take care
Deb
x
To colour in the vines and butterflies, I used letraset Tria markers. I find these markers can actually be used on ordinary cardstock as well as speciality paper, so it makes them more flexible. The base card is Kaszazz ivory stock and the embossed vine piece is stuck flat with the other things, butterflies and words mounted for some height.
I have made quite a few today, so I'll pop some more up over the next few days.
Until then, be inspired
Take care
Deb
x
Sunday, March 24, 2013
Fairy Moon card
I love fairies and angels- so I really enjoyed putting this card together.The base card is ivory. The background has got to be one of the easiest backgrounds to do. I used the Kaszazz masking tape and just layered various designs across and cut it off. Easy. You can leave a gap in the design and stamp a small happy birthday repeatedly to also add to the effect.
I then stamped this gorgeous fairy stamp- the name of it eludes me- so if you know, please let me know so I can acknowledge the creator. I coloured it using tria markers- which I love. I then cut out a circle and did a light blend of gray and purple on the moon for effect.
Quite a simple card really, but really enjoyable to make.
Happy crafting.x
Sunday, June 17, 2012
Blue bird of happiness cards.
I created these cards quite a while ago, so I'll give it a shot as to how they were created! I used chalk inks for the dots, and in flowers, I used distress inks to create the blended backgrounds and for the birds. The stamps are all Kaszazz stamps. I created the tail of the bird by punching a daisy punch and trimming 2 petals off, then sticking it onto the bird. The flowers have a petal stamp which I embossed using a pearl embossing powder and then filled in the middle with a circle stamp using tangerine chalk ink. Another thing I did with these is make some features using the smallest double sided tape (3mm) and gold foil. Sorry for the vagueness of this post, but the cards are quite busy and lots of products and techniques were used. If you have any questions, feel free to ask.
I hope your week is filled with creative fun.
Deb
xx
Saturday, June 9, 2012
Funky Flock Card...
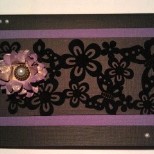
This birthday card was created using a black and purple textured cardstock . The flower frenzy flock ( say that when you're drunk!), is a self adhesive flock from Kaszazz. I created the flower using the scallop punch - several layers, spritz with smooch spritz grape and then do some creative crunching!
I needed to create a gift card holder, so made a die cut scallop strip, tied some ribbon around and then could slot my card in. I then used the scallop die at the bottom of the inside piece to tie it all together. The scallop die is from Kaszazz and I used the ezy-press to create it.
Anyway, hope your weekend it great, we have a long one- The Queens' Birthday weekend.
Happy Birthday Elizabeth.
Take care
Deb
Thursday, June 7, 2012
Cherish Frame
Just a simple frame that I created for a competition. I used distress crackle paint to distress the white areas. I stamped a Kaszazz flourish stamp on both sides using stazon ink. I coloured some white lace to a pink using distress stain- spun sugar. I created the rose using circles and was quite proud, but I have since learned some much cooler techniques on making paper roses!! Oh well, we live and learn. I also used some bling words from Kaszazz - Cherish. Did you know that you can colour any bling and bling words using your re inkers? Just make sure they are permanent ink re inkers, and then you can customize them to your projects. Pretty cool hey?
Anyway, I hope you/re having a creative week so far.
Take care
Deb
Tuesday, June 5, 2012
Butterfly explosion
Sunday, July 17, 2011
Art Journal #3
This page,like the others really just evolved. I dragged tumbled glass distress ink and bundelled sage distress ink across the paper to create a background. I then stamped one of our new large stamps on the right side using silver colorbox ink. The silver flower image on the left is made using a design adhesive and holographic metallic foil. this one evolved around the words: 'There are no Ordinary Moments" I wanted to make it a bit Etherial.
Now with this page, I wanted to use the swirl flower type technique and then thought, it's a bit out there! I then thought of the them of daring to dream and be a little different, hence the use of some unusual colours. Obviously the wings represent the desire to fly and achieve all that you set your heart on. I love layering papers and often enjoy putting some colours together that I wouldn't have thought of but that would make some ideal backgrounds.
Now I know the Art Journal is taking over this blog just a little, but when you look at the pages, there may be something in them that you like. Take that little thing and use it in your next creation.
I hope you have a creative week- mine will be!
Take care
Deb
Monday, July 11, 2011
Art Journal #2
This page was fun because I created the background using inks and stamps. It's great to let yourself be free with them.I just love trees, so it seemed natural to do a tree. I used the kaszazz stamps and the ezy press for the leaves. I just love the leaf die . I punched the blossoms out of SB paper using the small scallop punch. As I was doing this I was pondering how our lives change and move through different seasons, this really is theraputic.
Sorry for the strange placement- the computer has a mind of its own!! This actually started out as me sticking down some SB paper to cover the ink that had leaked through from the other page. I then wanted to use distress crackle paint in white, so I just painted it and then thought it looked a bit waterfallish. It all just grew from there. I added bits of smooch to highlight as well as glitter. The words on here are: Give thanks. It doesn't matter who you thank, just make sure you are grateful to family, friends, for situations and give thanks to any higher power whom you worship if that's your thing. It can do so much for your soul to be grateful. It lifts you up and helps you to soar.
Well, that's my bit of art and philosophy for today.
Hope you have a great week.
Take care
Deb
Well, that's my bit of art and philosophy for today.
Hope you have a great week.
Take care
Deb
Wednesday, July 6, 2011
Art Journal #1
Well, I've been having the best time creating an Art Journal! What I"ve enjoyed the most is the freedom of knowing that this is just for me. I don't have to create to give it to anyone, it's just for the fun of it. I've used a visual arts diary for this. All products are Kaszazz . On the cover I"ve used an eclectic blend of our SB papers. The words are from our Carnival stamp set, the ferns are a Lucy stamp, everything is current. I punched 3 large daisies and 3 medium ones to create the flower in the corner. The base paper is a print, but I stamped over it using chalk ink - berrylicious, lime pastel, pink pastel. I also distressed the edges.
On the first page , I drew the face using pencil and then coloured parts in using the stylus and sponges and distress inks. I stamped again with berrylicious on the background as well as coloured the background in with a sponge. I used the Girls rubons for the extra words etc that are black. Of course some glitter was added....... naturally.
Anyway, I hope this inspires you to head out and pick up a visual arts diary to do some creating. Give it a go, I think you're going to love it!
Take care
Deb
Subscribe to:
Posts (Atom)